Sunday, January 30, 2011

I think I'm ready. . .

. .to show you the laundry room.  You will have to use your imagination for one picture, my amazing dad is in the process of building me a counter to go above my washer and dryer. I know it will tie everything together. For now here is what we have. . .
I found the perfect thing to help with the other side of the room- I went into Joanns and they had these green vases filled with feathers, I loved the color of the feather, and they were on clearance almost 70% off!!  I am still debating weather to make the pizza thing green. . .hmmm. . .
 Here are the curtains I made here
 This is our "drop" zone-where we drop everything when we walk through the door. . .
 I love all the little details. . .
 This is where you are going to need to imagine a beautiful counter. .  it's going to be amazing!!!
The color I used is Martha Stewarts Phlox.  I was hoping it would of been a little more gray, but I love it with the curtains, and now that I have everything up I don't notice the purpleness in it anymore. .

Saturday, January 29, 2011

Valentine Countdown 1, 2, 3 and 4

My first few days will be this:

Day 1: "Bugs and Kisses"- I used kisses, gummy worms, and chocolate covered raisins.

 Day 2: This is more of an inside joke with my Husband and me, so I got Chapstick and am going to make a tag that says "Stick with me, babe".   You could also use the Napoleon quote, if you find that funny.
Day 3:  I got cherry sours, and I am going to make a tag that reads:
"I wanted to get you something special,
So here's the scoop
I love you so much
I found you Cupid Poop!"
*you could also use red hots, twizzler bites, or anything small and red :)
 Day 4: Valentine Tic-Tac-Toe
I made the hearts out of felt, since I was using black thread, I just traced hearts on the pink felt with a pen, and then sewed over my line. 
 I cut them all out.  You will need nine hearts for each game you make.
 I just drew lines in Word and trim them down to the size I wanted.  I made the squares 2x2 so the board is 6x6. 
 I think the kids will have fun with this one!


Friday, January 28, 2011

Valentine Mail

I love Valentines Day. . .the red, white, love, candy, flowers, cards!!  It's just a fun filled holiday that you can do so much with!!  Every year I do the 14 days of Valentines for my husband.  This year I thought it would be fun to included my children.  When I was at Sam's Club the other day I was looking at their "clearance" section and I found these cute Christmas boxes filled with chocolate covered pretzels. They were 2.91 for three of them, so I thought "well if the chocolate is nasty I can always use the boxes for something". . .I wish I would of picked up another set. . . so I could of made a set for each of the kids, but since I didn't I am just making one for my Husband and one for the kids.

Here are the boxes. . .aren't they so cute. . .I love the tops.  My first thought was to use the tops as is, so I had some blue paint almost the exact same color as the blue background, so I painted the boxes blue.
 I was very surprised at how it covered, and I only had to do one coat. I love the little window!!
 I added some little touches. . .very simple.  Do you notice how the "mail" on the left side is not centered.  After putting the stickers on I realized they needed to slide over a little bit to make it centered. The M and the A came off, but when I went to pull the I off the paint started to come with it. . . .yikes. . .not wanting to have to paint it again and wait for it to dry (I am so impatient like that)- I just tied the ribbon around and put the knot in the middle of the I and L. . .hehe    After decorating everything the tops still made them look to Christmas-y so I left them off.
Stay tuned for what I am going to do for each of my days of Valentines. . . since my husband and children don't ever read this blog. . . I can post them for you. . . .if you would like to join along, go find some cute boxes to make over, or check out these cute chairbacks from potterybarn if your ambitious, those would be easy to make and super cute!

Preschool

Lesson # 8 Sunday is the Day to Remember Heavenly Father and Jesus Christ

Mon- Discuss and sing Songs- Saturday, The Chapel Doors, When I go to Church, The Commandments, Pioneer Children Sang as they Walked

Tues- Library Day. . .Get books about church or Sunday. . . there are a few at our library. . .you could do books about the days of the week, calendars ect

Wed- Help them use their fine motor skills, and make this

Thur- Make Ice cream sundaes using this idea

Fri- This is a really cute legend-you could make and laminate a sand dollar they could hang in there rooms, to help them remember.

Thursday, January 27, 2011

Einstien

If any of you have been in my shoes, well I am sure you have, let me just say the insight I have recieved from this book and the wonderful insight of my mom in getting this book for me. Two years ago when my son was born I found my self worrying about his future. I kept thinking what if he is not smart... what if he fails at school... what if.... what if... I was becoming overrun with what if's. I confided in my mom and she found this book and got it for me.
I actually have not read the entire book. I am working on reading it in my spare time. I do have to say that I have very much enjoyed what I have read. This book offers great insight, especially if you are worried about a certain child. If you are fleeding because your mind is being bamboozled with what if's, try looking through this book.

Wednesday, January 26, 2011

Hidden Valley Ranch

It really does make everything taste better!!
My kids aren't big into eating veggies, and the only way I can get them to eat them is if they have some Ranch to dip it in. . .most of the time they ended up eating more Ranch then veggies, so the other day I cut up cucumbers and carrots into bite size and added a squirt of Ranch (you don't need a lot-a little goes a long way) and my kids ate it all up, I have never seen them eat so many veggies in one sitting!!  I later tried it with adding tomatoes and green peppers-the kids weren't as thrilled with that, but I sure loved it!!

Tuesday, January 25, 2011

New Product

When I thought about decorations for the laundry room there was one thing I wanted to do and that was cover frames in moss, I love the color of the moss and I wanted to add that texture and look into the room.  I went in search of some moss, and could only find big clumps of stuff sold in a big bag. I held off on getting something and I am glad I did, because when I ran into JoAnns the other day I found this:
It's moss, but a sheet of it, almost like moss fabric :) It says it's a new product, not sure how new it is, but I haven't ever seen it. . . I knew this would be perfect to cover the frames.
 First I covered the frames with the green flower tape I had from another project. After completeing the project I would say this step is a must. . .it helped hold the moss while I glued it down, and it helped camoflauge the frame so I didn't have to cover the whole frame.
 As you can see in this picture I layed it up next to the inner frame, and then wrapped it a little bit around the side.  I used my hot glue gun to glue it down.
 I used the same ribbon i had used to tie back the curtains, and hung them on the wall.  I love the softness look of the ribbon, and it turned out just how I wanted!!

Monday, January 24, 2011

Kid Friendly Cow Brains

Okay so really it is Macaroni and cheese... My son likes to call them cow brains.
I don't have a picture of it, just trust me it is good.

This recipe is for a whole box of noodles.

Cook the box of noodles. While the noodles are cooking. Combine the following in a leak proof tuberware.

1 cup of flour
1/4 cup sour cream
3/4 cup of milk*
1/2 stick of butter
2 tsp of garlic
Salt and Pepper to your taste.

Shake this mixture until there are no clumps.

Pour into a pan and stir constantly until thick. Add about 2 cups of cheese. Mix until melted.
Drain noodles and add to mixture.
Then add other 4 slices of american cheese or half a bottle of cheese sauce.
Stir and serve.

* my niece is alergic to milk so I substituted water and it worked out very well. She can have sour cream and cheese.

Shopping the Thrift Stores

I am going to step up here on my soap box and tell you my two sense on thrift shopping for decorations.  Remember this is only my opinion.  I have not had any school or professional training in this area, nor do I claim to be an interior decorator. . .but I have learned a few things.  Now a couple of years ago I would of told you that you can't find good things at the thrift store to use in decorating. . .and if you could you have a rare talent. . . while I still think there are those select few you have a rare talent of seeing something un-useful and making it useful and amazingly cool, . . . I feel I am learning a few tricks of my own.  First when you go into the thrift store make sure your not looking for something specific, or you won't find it.  Look for shapes and textures, because trust me when I say this-you can spray paint just about EVERYTHING!!  Before I left to go thrift shopping I had two things in mind, I wanted to get some "silver" things and I wanted some tall things.
 The silver bowls were probably my best find!!  I am going to leave those as is-love them- The pizza thing I am thinking I might need to paint it green (as you will see in a later photo).  The wood serving thing I spray painted also.
 This thing (I think it's an old trash can cover thing they used to have without the bottoms) anyway I loved the texture of it, and I knew I could spray paint it, so I didn't hesitate to pick it up. 

 There it is all painted!!  I love how you can still see all the texture.
 Old books are a must for me-they have so many uses so I never pass those up-This one I painted silver and tied a yellow ribbon around it-
Also don't be afraid if something is dirty or rusty. . .you can either clean it up or leave it to add to the character of the room.
That little tin up front is rusted, and when you pick up the lid it sounds like there is sand or rocks in it, but I still got it. . .why? . . .because it's silver, so cute, and just the perfect thing to hold stuff that I find in pockets.  The big jar was a gift from my mom (where I am going to keep my dryer sheets), and the other jar was a thrift store find. . .jars like that are a never pass up!!!

And here it is all put together.  I love this side of the room.  I love the height of everything the touches of color to pull it all together, and the pieces of silver and clear.  I know there are probably people out there that would say this is alllllllll wrong, but I think it looks great and hey I'm on the soap box right now :)!
 This side is struggling a little bit. . . .that is why I am thinking to make the pizza thing green. .  .but I would also like a little more texture added to it so I am still thinking.  I also think it needs something taller. . .still working on that to. . . I do love the tin. . . this was given to us full of cookies. . . we ate the cookies and I was about to throw the tin away when I thought "this would look great in the laundry room" :)
Okay I think I have spent my fair time on the soap box.  I hope what I shared will help you in your adventures at the thrift store!

Friday, January 21, 2011

Preschool

This week is lesson number 7 "Jesus Christ created the world for me"

Mon- Discuss and sing songs, they could include, Popcorn popping, Rain is falling all around, In the leafy treetops, The world is so big

Tue- Library books could include anything about the Earth, trees, animals, anything God created you could choose to focus on.  Since we just focus on Earth for our lesson a couple of weeks ago I though it might be fun to focus on water, so we will be getting books on water, and the water cycle.

Wed- Boil water and let them watch it evaporate, and do this science project. 
 Science - The Cotton Ball & Water Activity Ages 2+This is a really easy and fun activity for the youngest children.

Materials:  One cotton ball for every child, some flat pans or containers filled with about an 1/2 inch of cold water.

1.  Give each child a cotton ball to hold.  Tell them to pretend that they are holding a cloud. 
2.  Ask them how does the cloud feel:  heavy or light, soft or hard.
3.  Instruct the children to place the "cloud" (cotton ball) gently over the cold water.  Explain that water that has evaporated has traveled up to the cloud and it is a lot colder up in the sky, so the vapor turns into water, and it is filling up the cloud.  Ask: Can you see the "cloud" (cotton ball) filling up with the water.  
4.  Ask the children to gently pick up the "cloud" (cotton ball) from the pan.  Ask:  How does the "cloud" feel now?  Light or heavy.  Warm or cold?  What is happening with the water?  Yes, the water is dripping from the "cloud".  Why?  The cloud cannot hold all that water, is too, too, heavy.  What do we call when water falls  from the clouds because they are too heavy with water?  Yes, you are right, rain!  It is raining! And what happens to the water?  Yes, it is coming right back into the pan, and the pan could be a stream, river, ocean or the ground.  

Thur- Make your own little green house

Fri-  Get a big bucket of water and let them have water play.

Thursday, January 20, 2011

Kitchen Re-do

Have you ever read those post where whoever is writing it, was driving down the road and found a great treasure that they just couldn't pass up???  I ALWAYS thought to myself and you might of too. . ."that never happens to me". . .finding something great on the side of the road. . .I am here to tell you not to give up. . .because it does happen!!

A few months before Christmas I was heading over to a friends house for girls night out, I drove down her street a little bit to turn around, and there I saw it. . .
and it really happens like they all say. . .Your heart skips a beat, a light comes down and shines on it and you hear faintly the sound of what you can only describe as angels singing.

I stopped and just starred at it for a while, I hesitated just getting out and shoving it in my car, one it looked pretty heavy, and two my mom had always taught me that stealing is wrong.  I kept telling myself that it wasn't stealing if it was thrown out for trash, but I just couldn't take it. . . so I went up to the door to see if anyone was home.  No one answered so I wrote a note and shoved it in my car, hoping I wouldn't have to bring it back.  Later I got a call from the owner who had made it for his daughters 20 years ago, and he was happy I had taken it!!!
I knew this would be perfect for my youngest for her birthday, I set it aside and told myself I couldn't work on it until after Christmas. . .it was hard to do, but the week after we got back from vacation I started working on it.

I cleaned it all up and painted it the turquoise color in the playroom.  I lightly brushed the brown over it to make it look "old" :) love that look!!  I also knew I wanted to use the red so I thought red polka dots would be super cute.  I got the fabric and surged around the edges. I gathered the top and hooked it to a strip of ribbon to give it more stability.  I then tacked it up on the underside of the wood.  I was going to do a spring rod, but I knew the kids would just pull it down, I am hoping this way it holds up better!


 I spray painted the faucet red. . .I was a little worried that it wouldn't work, but it turned out great.  I took it all apart and sprayed each piece, and then when it was all dry I put it back together again.  All the parts still move, and I love the red!!
 I bought I cute little nob for the front of the oven.
 I had a little white basket laying around so I thought it would be perfect for her to keep her washcloths ,  tablecloths and place mats I made for her.  I have a bigger basket for under the sink to store all the dishes when not in use.  On the right hand side originally it was a stove, but for Christmas my Dad made my little girl a super cute portable stove, so I left it blank, so she would have a spot to set her stove, and to play.  I just love the polka dots and how it looks, so simple, but I know she will love it!!
Keep your eyes open for treasures. . .you never know when you're going to find yours!!

French Toast Sticks

My husband came up with this great idea! I just had to post it. These are really simple and kids lov them. Just give them a little bowl for some dippin' syrup.

French Toast Sticks
1 tbsp flour
1/2 tsp cinnimon
1/2 tsp Baking Powder
3 eggs
1/2 tsp sugar
1 tbsp water
2 tbsp Evap. Milk
Mix together dry ingredients. Then add liquid. Blend so there are no clumps and the eggs are mixed well. Put about a half an inch of oil in your pan and fry both sides until golden brown. Make sure you slice your bread into sticks. This recipe does about 5 to 6 slices of bread.

Tuesday, January 18, 2011

Hostess HoHo Cake

So when I usually make this I make it in a sheet cake style. You could make your own chocolate cake... though I like it best with store bought.

1 box chocolate cake mix

1st icing
1 cup milk
3 tablespoons corn starch
1/2 cup butter
1/2 cup crisco
1/4 tsp salt
1 3/4 cup powdered sugar

2nd icing
1/2 cup butter
1 tsp vanilla
1 egg
3 squares of semi-sweet baking chocolate
2 1/2 tbsp hot water
3 cups powdered sugar

Mix cake according to directions on box. Grease a 14x18 or similar size baking sheet. Bake @350 for 15 min. or until toothpick comes out clean. Cool.
Make first icing by cooking milk and cornstarch together until thick. cool. (I cover to keep from getting a scum on top) Cream butter,crisco,salt,sugar, and vanilla togeher. Beat well. Add the cooled milk mixture. Spread on top of cake. Refridgerate until it is not too soft to put on next icing.
Make second icing by melting butter in a saucepan. Add the remaining ingredients and mix well. Spread on top of first icing. The chocolate icing will be runny, but it sets up quickly.

This recipe is fairly easy to do... Your kids will love it. It tastes just like hohos, and you can send it in their lunches for school as a great homemade alternitive. Cut up in squares and freeze!

Saturday, January 15, 2011

Here We Come!

So my Husband got a job in Idaho... we are very excited for this opportunity. Though, with this opportunity comes colder weather... Let's face it Arizona has some nice weather, very mild. I mean today when some people could be getting snow we are having tempratures in the upper 60's. So my children do not have many warm clothes. So I decided that I was going to make Princess P a cute earmuff headband.  If it looks big that is because it is. I made it so that she can also wear it again next year. So what I did was I embroidered the flowers on two correlating prints with my strip. I actually digitized the image... Oh, how I am going to miss my mom's embriodery machine :(. Then I cute the strip 3 inches, and I cute the fleece 2 inches. I sewed so that right sides were facing eachother. I then turned it. I pressed it and cut an elastic that was about an inch bigger than my daughter's head. I fed the elastic through. Then I sewed the open pieces together. Then I set the hem to one side and sewed that down.

Then I machine stitched he bottom flower on and then I hand stitched the top flower on. We are so excited to move and we are getting more and more ready!

Friday, January 14, 2011

The Daily Grind. . .

So I have taken my Christmas/New Years break long enough, and it is time to get back into the swing of things, and that means Preschool at our house.  So this next week the Lesson will be The Holy Ghost helps me! - (I am skipping lessons 4 and 5 because I want to use them in Feb near Valentines Day)

Mon- Sing songs and discuss the topic for the week- Songs could included- Listen, Listen (this would be fun to teach as a round), The still small voice, The Holy Ghost, The first Article of Faith

Tue- Library Day- Books we got were in the Halloween section, I just found books that had ghost in the title :)

Wed- Play Marco Polo, but change it up and use your kids name. See if they can find you blindfolded by saying their name quietly.

Thur- Stitch a ghost Project.  Here is the link to the Ghost, Trace the shape onto  card stock or cereal boxes work really well, punch holes in it and find a string, let them stitch around the edges.

Fri- Make hot chocolate and put mini ghost in it(marshmallows)-this could help them understand how the Holy Ghost makes us feel warm inside!

Wednesday, January 12, 2011

Kitchen All Done

So I we have had the kids kitchen done before Christmas. I wasn't going to post it because I forgot to take a before and after, but my sweet sister told me I should post it and just explain. So here it is.
Okay so we took two nightstand that we found at a yard sale and a thrift store, and we made them over. You can just do one, but we decided to do two the the kids had more playing room.

So the stove was a double pull drawer. You can't see it very well but I did vinyl on the back to make it look like buttons. Also around the knobs.

The kitched was also a double pull drawer. On this one we put a little chalk board and on the other side we did a towel rack. We did a little curtain for under the sink. I personally loved how they turned out.

Tuesday, January 11, 2011

Spring Cleaning

I know it is still January, but I have been wanting to clean up my fabric for a long time now, I have been putting it off, because I knew I wanted to use the fabric to make gifts that I would have, but i was still waiting for creative inspiration! So last night I had a little bit.  I am going to make a Rag quilt with my fleece leftovers. Here is a link to a great tutorial on how to make a rag quilt. Since I am using fleece I will not be doing two layers, or putting batting in the middle.  There is an intersection that I always go past when we go shopping that always has a homeless person, I hate to just hand them money-because of the natural judgmental woman in me- so I decided that I would make a blanket to hand to them next time I am out-and if they really are homeless a nice warm blanket would be better then money right????  I was hoping I would be able to make a couple with my scrapes, but I was only able to get one -guess I didn't have as many scrapes as I thought :).  

I ended up cutting my squares 5x5 and the full quilt I did 10squares by 15. That is not the way i am going to lay it out, I was just trying to figure out how big I needed it. I think I will just do this one random, with the border in the green.


My next project is to make some baby quilts for my daughters babies.  I think I will have enough to make a couple, and I it will be easy to machine quilt them since they will be so little.  
Another idea I had was to make these cute little "love" birds.  Aren't those the cutest!! I have plans for them later. . .:)
and also maybe make a few of these
I love the cube and the elephant. I am hoping to put them in a box to save for gifts for baby showers. . . I need some boy gifts :)
I also thought of making a bunch of bags, it's always fun to have a homemade bag to take a gift in or to even give as a gift. My sister did a tutorial for a really cute bag here.
Well with all those ideas. . .I'm off to get to work!
What are you going to make with your scrapes??

Monday, January 10, 2011

So I have Decided....

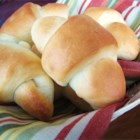
So I have decided that I just love having new and simple recipes to try... So every Monday I am going to post a new easy recipe that I just love using. Today I am going to post about Sweet Dinner Rolls... they taste like the hawaiin rolls you can buy at the grocery store... So yummy.

Sweet Dinner Rolls Recipe

Ingredients

  • 1/2 cup warm water (110 degrees F/45 degrees C)
  • 1/2 cup warm milk
  • 1 egg
  • 1/3 cup butter, softened
  • 1/3 cup white sugar
  • 1 teaspoon salt
  • 3 3/4 cups all-purpose flour
  • 1 (.25 ounce) package active dry yeast
  • 1/4 cup butter, softened

Directions

  1. Place water, milk, egg, 1/3 cup butter, sugar, salt, flour and yeast in the pan of the bread machine in the order recommended by the manufacturer. Select Dough/Knead and First Rise Cycle; press Start.
  2. When cycle finishes, turn dough out onto a lightly floured surface. Divide dough in half. Roll each half into a 12 inch circle, spread 1/4 cup softened butter over entire round. Cut each circle into 8 wedges. Roll wedges starting at wide end; roll gently but tightly. Place point side down on ungreased cookie sheet. Cover with clean kitchen towel and put in a warm place, let rise 1 hour. Meanwhile, preheat oven to 400 degrees F (200 degrees C).
  3. Bake in preheated oven for 10 to 15 minutes, until golden.

Thursday, January 6, 2011

Recovering an Ironing Board

After talking to my mom she informed me that there are a lot of tutorials to recovering your ironing board on the internet, I should of probably read a few of them. . . it would of saved me some time, I still  decided that I would post about my experience, just if you care to learn from it. 
 First I took off the cover and removed the padding.
My cover had a string around the edge that you just pulled tight.  I decided that this would be easy to recreate so I just pulled the string out so I could re-use it.
 I then layed my cover down on the right side of the fabric and cut it out.
 Here is where I could of saved myself a lot of time.  In my mind I thought I would zig zag along the edge and then just feed the string through the zig zag with a safety pin. 
1. I should of used a wider zig zag
Because after I got done sewing the safety pin wouldn't fit through the threads, and I ended up having to use a needle, and it kept catching on the fabric. It took me a while to feed it all the way around that way.
2. I should of just put the string through the zig zag as I sewed so I wouldn't have to feed it through the whole thing.
After I finally got it all threaded. I set the padding and the cover on top the ironing board, and pulled the string and tightened it around the edges.
 Despite my mishaps-it ended up working out and I love that it matches the laundry room!!