Showing posts with label laundry room. Show all posts

Sunday, January 30, 2011

I think I'm ready. . .

. .to show you the laundry room.  You will have to use your imagination for one picture, my amazing dad is in the process of building me a counter to go above my washer and dryer. I know it will tie everything together. For now here is what we have. . .
I found the perfect thing to help with the other side of the room- I went into Joanns and they had these green vases filled with feathers, I loved the color of the feather, and they were on clearance almost 70% off!!  I am still debating weather to make the pizza thing green. . .hmmm. . .
 Here are the curtains I made here
 This is our "drop" zone-where we drop everything when we walk through the door. . .
 I love all the little details. . .
 This is where you are going to need to imagine a beautiful counter. .  it's going to be amazing!!!
The color I used is Martha Stewarts Phlox.  I was hoping it would of been a little more gray, but I love it with the curtains, and now that I have everything up I don't notice the purpleness in it anymore. .

Tuesday, January 25, 2011

New Product

When I thought about decorations for the laundry room there was one thing I wanted to do and that was cover frames in moss, I love the color of the moss and I wanted to add that texture and look into the room.  I went in search of some moss, and could only find big clumps of stuff sold in a big bag. I held off on getting something and I am glad I did, because when I ran into JoAnns the other day I found this:
It's moss, but a sheet of it, almost like moss fabric :) It says it's a new product, not sure how new it is, but I haven't ever seen it. . . I knew this would be perfect to cover the frames.
 First I covered the frames with the green flower tape I had from another project. After completeing the project I would say this step is a must. . .it helped hold the moss while I glued it down, and it helped camoflauge the frame so I didn't have to cover the whole frame.
 As you can see in this picture I layed it up next to the inner frame, and then wrapped it a little bit around the side.  I used my hot glue gun to glue it down.
 I used the same ribbon i had used to tie back the curtains, and hung them on the wall.  I love the softness look of the ribbon, and it turned out just how I wanted!!

Monday, January 24, 2011

Shopping the Thrift Stores

I am going to step up here on my soap box and tell you my two sense on thrift shopping for decorations.  Remember this is only my opinion.  I have not had any school or professional training in this area, nor do I claim to be an interior decorator. . .but I have learned a few things.  Now a couple of years ago I would of told you that you can't find good things at the thrift store to use in decorating. . .and if you could you have a rare talent. . . while I still think there are those select few you have a rare talent of seeing something un-useful and making it useful and amazingly cool, . . . I feel I am learning a few tricks of my own.  First when you go into the thrift store make sure your not looking for something specific, or you won't find it.  Look for shapes and textures, because trust me when I say this-you can spray paint just about EVERYTHING!!  Before I left to go thrift shopping I had two things in mind, I wanted to get some "silver" things and I wanted some tall things.
 The silver bowls were probably my best find!!  I am going to leave those as is-love them- The pizza thing I am thinking I might need to paint it green (as you will see in a later photo).  The wood serving thing I spray painted also.
 This thing (I think it's an old trash can cover thing they used to have without the bottoms) anyway I loved the texture of it, and I knew I could spray paint it, so I didn't hesitate to pick it up. 

 There it is all painted!!  I love how you can still see all the texture.
 Old books are a must for me-they have so many uses so I never pass those up-This one I painted silver and tied a yellow ribbon around it-
Also don't be afraid if something is dirty or rusty. . .you can either clean it up or leave it to add to the character of the room.
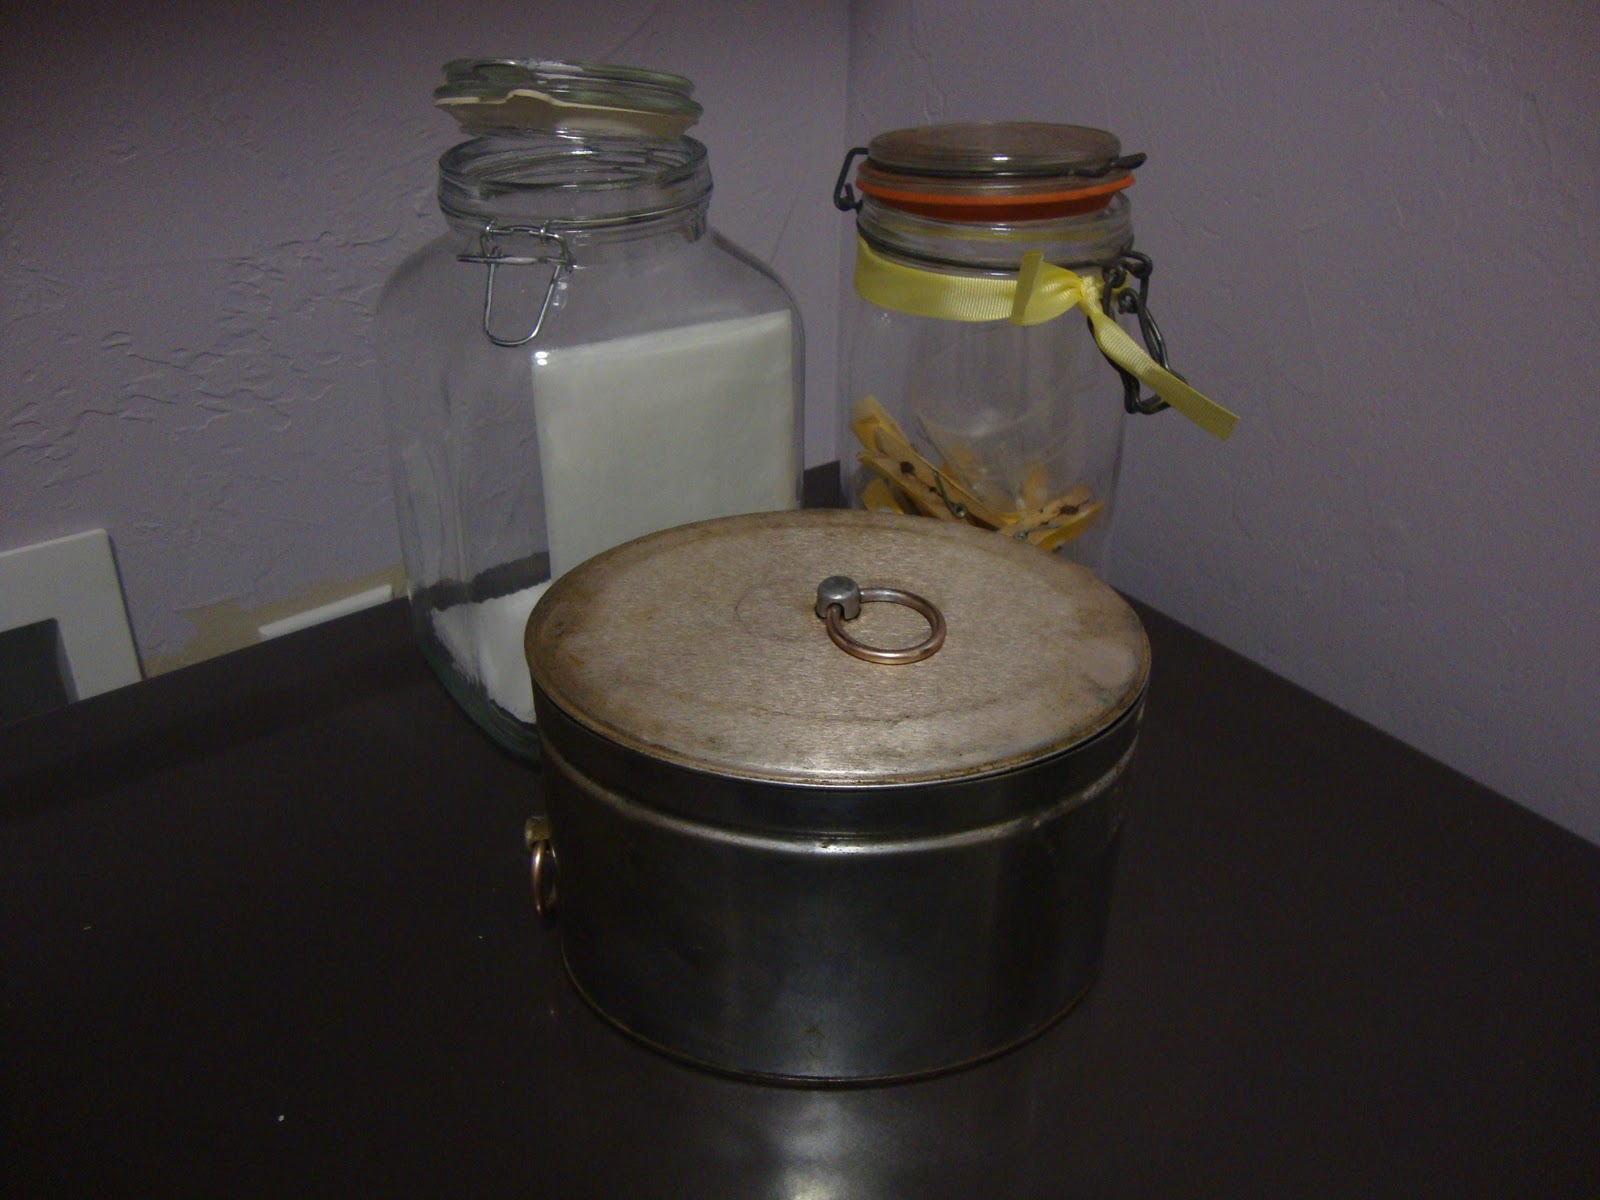
That little tin up front is rusted, and when you pick up the lid it sounds like there is sand or rocks in it, but I still got it. . .why? . . .because it's silver, so cute, and just the perfect thing to hold stuff that I find in pockets.  The big jar was a gift from my mom (where I am going to keep my dryer sheets), and the other jar was a thrift store find. . .jars like that are a never pass up!!!

And here it is all put together.  I love this side of the room.  I love the height of everything the touches of color to pull it all together, and the pieces of silver and clear.  I know there are probably people out there that would say this is alllllllll wrong, but I think it looks great and hey I'm on the soap box right now :)!
 This side is struggling a little bit. . . .that is why I am thinking to make the pizza thing green. .  .but I would also like a little more texture added to it so I am still thinking.  I also think it needs something taller. . .still working on that to. . . I do love the tin. . . this was given to us full of cookies. . . we ate the cookies and I was about to throw the tin away when I thought "this would look great in the laundry room" :)
Okay I think I have spent my fair time on the soap box.  I hope what I shared will help you in your adventures at the thrift store!

Thursday, January 6, 2011

Recovering an Ironing Board

After talking to my mom she informed me that there are a lot of tutorials to recovering your ironing board on the internet, I should of probably read a few of them. . . it would of saved me some time, I still  decided that I would post about my experience, just if you care to learn from it. 
 First I took off the cover and removed the padding.
My cover had a string around the edge that you just pulled tight.  I decided that this would be easy to recreate so I just pulled the string out so I could re-use it.
 I then layed my cover down on the right side of the fabric and cut it out.
 Here is where I could of saved myself a lot of time.  In my mind I thought I would zig zag along the edge and then just feed the string through the zig zag with a safety pin. 
1. I should of used a wider zig zag
Because after I got done sewing the safety pin wouldn't fit through the threads, and I ended up having to use a needle, and it kept catching on the fabric. It took me a while to feed it all the way around that way.
2. I should of just put the string through the zig zag as I sewed so I wouldn't have to feed it through the whole thing.
After I finally got it all threaded. I set the padding and the cover on top the ironing board, and pulled the string and tightened it around the edges.
 Despite my mishaps-it ended up working out and I love that it matches the laundry room!!

Saturday, January 1, 2011

Grommet Curtains

I am in the process of decorating my laundry room, and I have fallen in love with the Grommet style curtains, and decided that is what I wanted.  After making them last night, I wanted to post it so that you would all know how super easy they are!
I bought my grommets at Hobby Lobby.  You need to make sure that you get the kind that will just snap together, or else you will have to buy the machine along with it. . .and that can get expensive.  The ones I bought are plastic, but once you get it on your curtain, you can hardly tell.  It came with 8 grommets, to do one panel.  It also has this nifty little measuring tool to help you get the right sized hole.  
 I did my holes about 3 1/2 inches from the top and about 9 inches apart.  I also cut my hole a little smaller then the outline.  After doing the first one, I noticed that I didn't need to cut the hole quite so big.  I used pretty heavy fabric-singled, but there was plenty of space and the snapped together very nicely, so if your worried about thick fabric, don't be-it works great!
After you cut out all your holes,*hint* measure all holes before cutting incase you make a mistake* just take a bottom grommet and fit into the hole of the fabric, and then snap on the top! that easy!!  It helps to use a hard surface.  I used 7 of my grommets, because I measured wrong :)-but it would be better to use 8 grommets on a 54 inch wide fabric.  When I get my laundry room put together I will show pictures of how they look, but for now I don't want to ruin the surprise!!